

Want to get started with technical article writing? Here I explain what Ghost is and how to self-host a modern blogging platform easily
Ghost is a great and intuitive blogging platform. Having started with Medium to get started, I was looking to start my own blog. I first took a look at WordPress but changed my plan: I was spending more time on form than content.
When I discovered Ghost, it clicked. It was a perfect fit for my needs. However, no blogging without hosting.
Today you will through this tutorial on Ghost, you will discover:
- You'll see what Ghost is.
- The two different hosting options for Ghost and why self-hosting is ideal to start a blog
- Start self-hosting your Ghost blog on DigitalOcean simply and at the best price
What Is Ghost?

Ghost is a free and open-source blogging platform written in JavaScript. It is designed to simplify online publishing. Ghost aims to be a straightforward and intuitive platform with a minimalist user interface.
Unlike WordPress, Ghost is purely a blogging platform and not adapted for landing pages, and e-commerce websites. On the other hand, it is perfect for multi-author blogs, magazines, and portfolio sites. So choose Ghost for a content-based strategy.
Based on the NodeJS technology, Ghost offers much better performance than WordPress. This is an important factor to consider for the responsiveness of your pages and user experience. It directly impacts your SEO score.
Speaking of SEO, Ghost offers native tag optimization. It also provides large integration with third parties.
The greatest strength of Ghost is its simplicity. It uses Markdown rather than visual WYSIWYG editing. This allows you to immerse yourself in the content you are writing.
Why Self-Host Your Ghost Blog?
Managed vs self-hosted
Concerning hosting, you have two options with your Ghost blog:
- Managed: You don't have any server maintenance or Ghost upgrades to manage. The blogging platform is hosted on Ghost's server.
- Self-hosted: Your host your own blogging platform. You have to deal with maintenance and version upgrades.
The notable difference is the price you can afford to pay.
Pricing
The cheapest plan for managed Ghost starts at $25 a month billed yearly. It is the minimum ticket to use a custom theme. Add to that the addition of a domain to have a more professional look. This is not an obvious price to pay when you want to start a blog.
This is why I opted for the self-hosted with DigitalOcean. DigitalOcean is a cloud provider and official partner of the Ghost open-source project. It provides a straightforward Ghost installation through a marketplace.
To give you an idea: the cheapest plan you can buy on DigitalOcean for Ghost is $5 a month.
You will receive $100 credit by clicking and registering on DigitalOcean with the banner below:


Start Your Ghost Blog On DigitalOcean
Create the Ghost droplet
At DigitalOcean, droplets are Linux-based virtual machines. They run on physical machines. Each new droplet you create is a new server you can use.
Creating a droplet is very simple:
- Connect to your DigitalOcean account
- Click on "Manage" on the sidebar menu

- Then choose "Droplets"
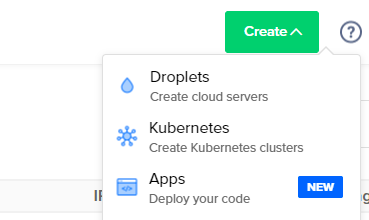
Now you have to choose an installation image for the new droplet. DigitalOcean provides an image to install Ghost.
Type "ghost" in the search bar and select the image:
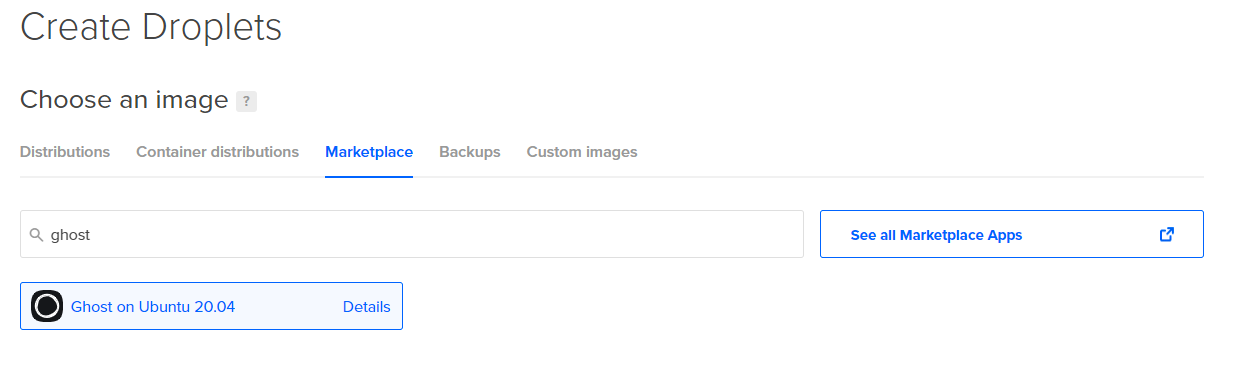
The droplet image contains the Ghost server and the necessary MySQL database.
Choose a plan for the new droplet:
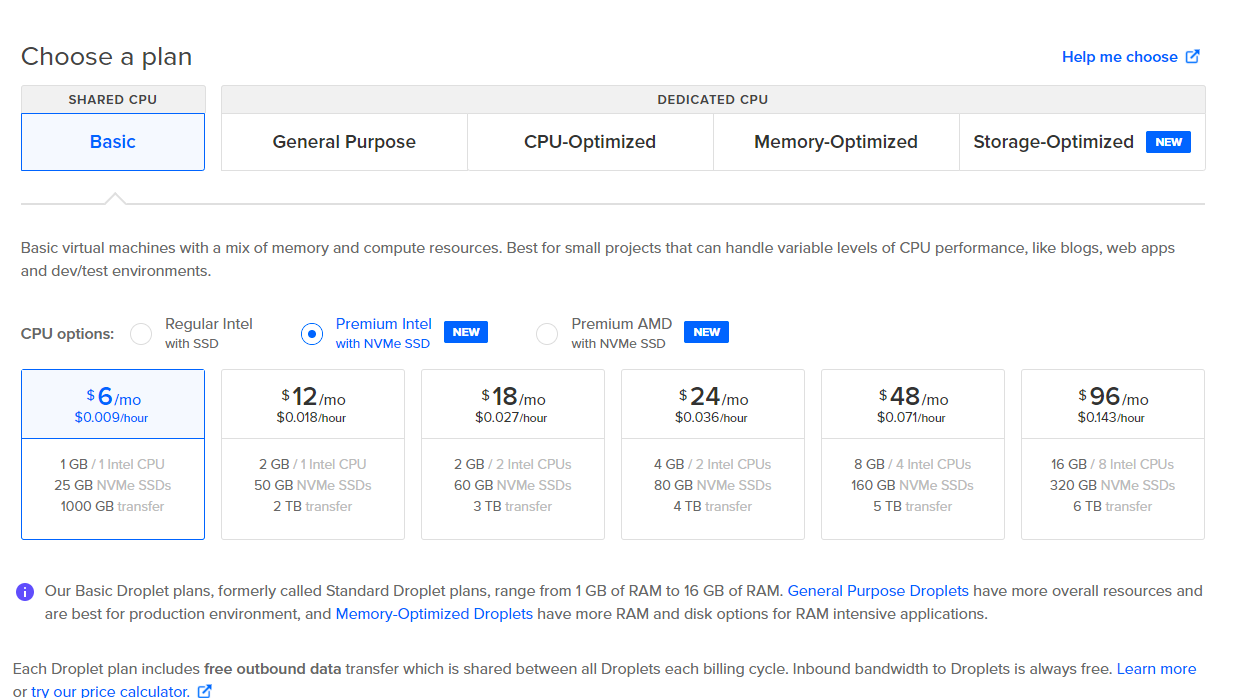
For getting started, you can choose the cheapest one start. You'll be able to update the plan following the evolution of your needs.
Configure the authentication to the droplet. Many bots on the internet attempt brute force attacks. For better security, choose "SSH keys".

For a little extra kick, you can have backups. I highly recommend you this option:

Finish the Droplet creation by clicking on "Create Droplet".
Configure the Ghost installation
Now it is time to configure the Ghost installation. You need to connect over SSH to the droplet.
Load the private SSH key corresponding to the public one you used when creating the droplet:
$ eval `ssh-agent`
# Change the path with your own private key if it is different
$ ssh-add $HOME/.ssh/id_rsa
Connect to the droplet:
$ ssh root@<your_droplet_public_ip>Once logged on the server, a prompt for the ghost configuration is displayed. You need to fill in your domain name and email for the SSL certificate:
Ghost will prompt you for two details:

1. Your domain
 - Add an A Record -> xxx.xxx.xxx.xxx & ensure the DNS has fully propagated
 - Or alternatively enter http://xxx.xxx.xxx.xxx
2. Your email address (only used for SSL)

Press enter when you're ready to get started!
Once finished, go to https://<your-domain>/ghost. On the welcome screen click on "Create your account":
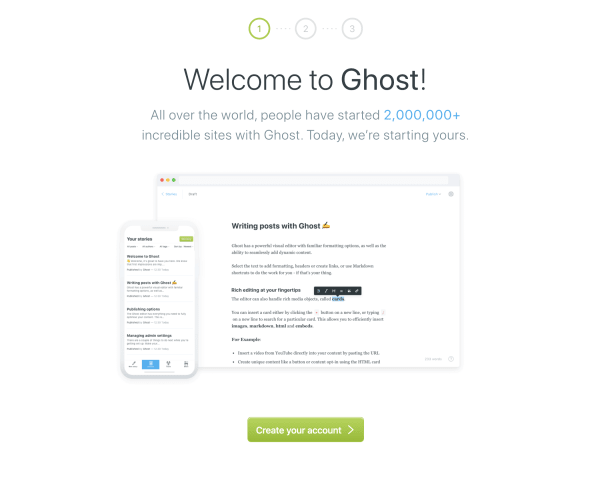
Enter your email, create a user and password, and enter a blog title:
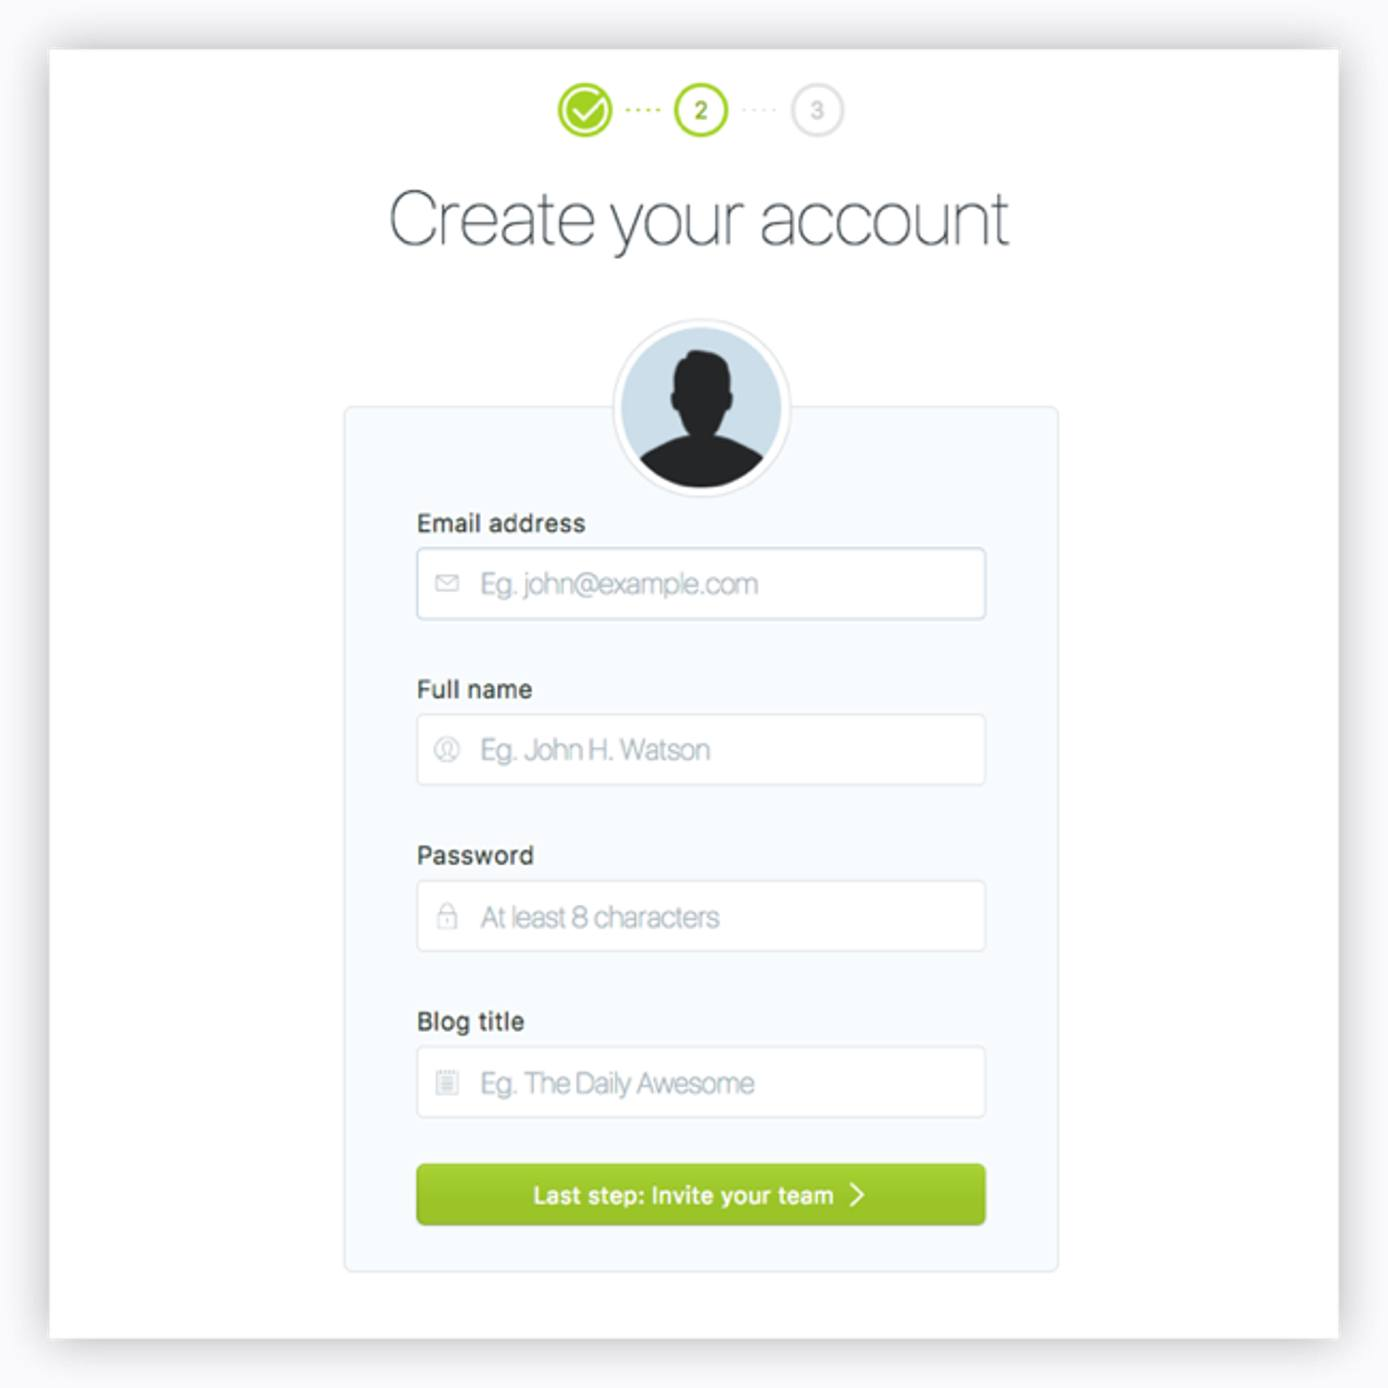
Invite additional members to your team if you want or click "I'll do this later, take me to my blog!" at the bottom of the page:

Configure Ghost settings and theme
Once Ghost is configured, you can log into the administration interface and configure the platform in more detail.
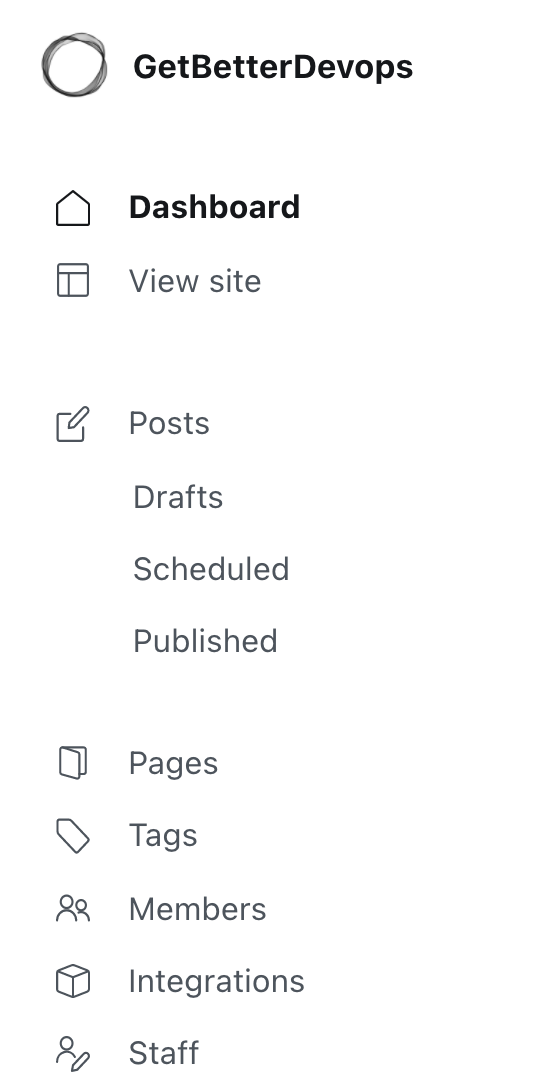
On the left menu, you have the menu with the posts and elements to manage:
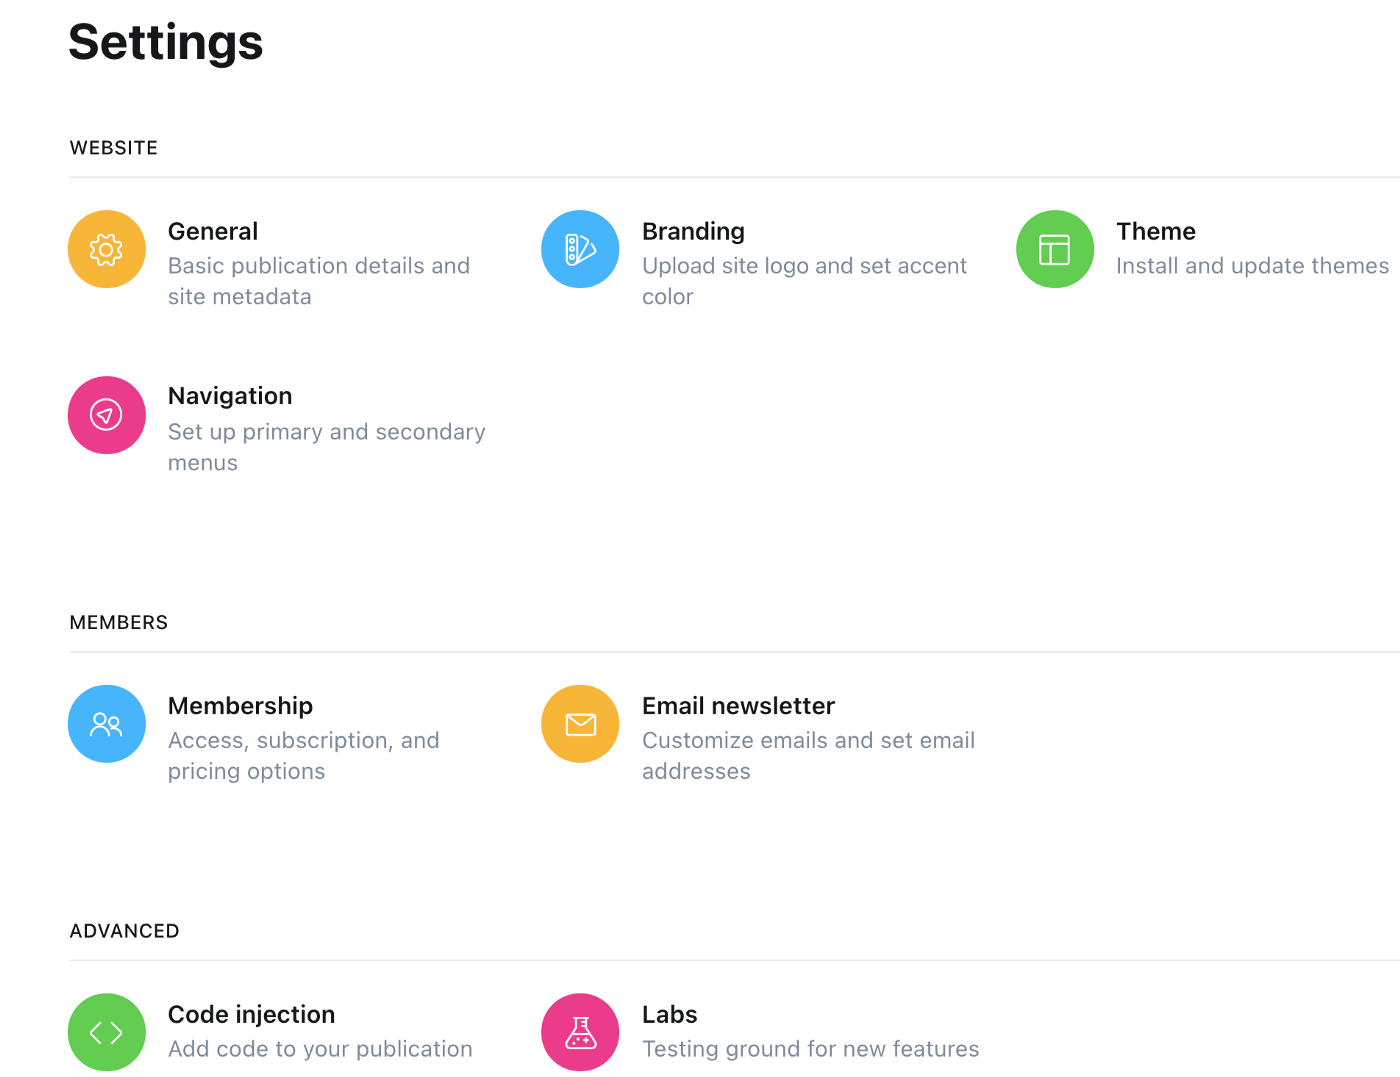
You can configure the Ghost settings by clicking on the gear icon at the bottom left:

You can customize the branding and theme:
You need to download the theme and upload it to the interface:
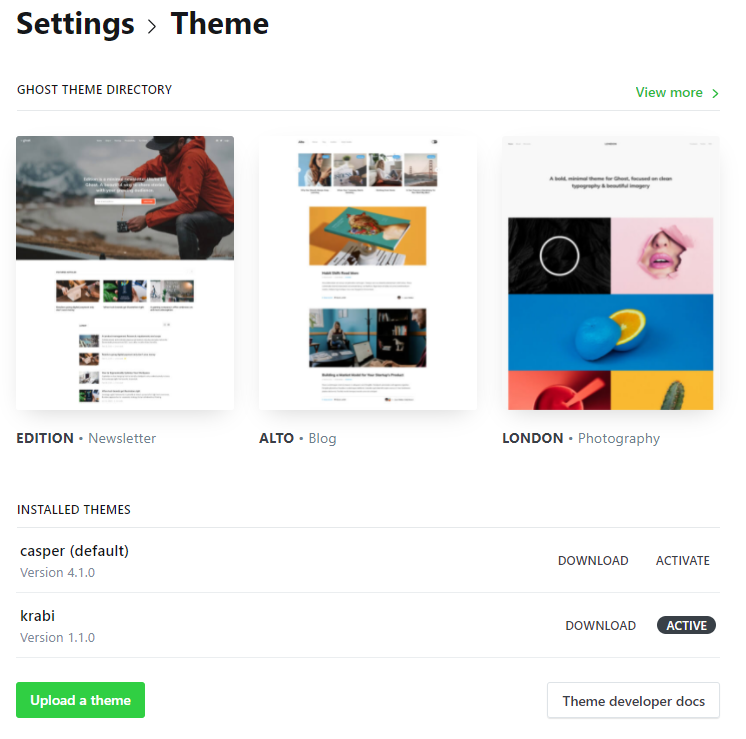
Ghost offers free themes to start. There are also paid themes. They offer a better aesthetic and advanced features: membership and newsletter support.
The blog you are reading uses Krabi theme:

Krabi is one of the many themes proposed by Aspire:

Conclusion
In this Ghost tutorial, you have seen first what Ghost is: a blogging platform of your own. The strengths of Ghost are its simplicity and minimalism. You focus on the content you write and not the design.
When you are starting a new blog, price is a key factor. This is the main reason to choose to go on a self-hosted Ghost blog. Having multiple blogs is also a good one.
DigitalOcean offers a solution with its marketplace to deploy Ghost easily. You just pay the hosting fees of the server. This makes it a very attractive solution to self-host your Ghost blog.
Congrats, you have set up your self-hosted Ghost blog. Now it's time to write!