

Build a modern "build, deploy & release" workflow without knowing the underlying infrastructure. Give developers back control of their workflow with Waypoint
Hashicorp is a company providing open-source tools for cloud practitioners. The company creates a bunch of famous tools in the DevOps world. The most popular is Terraform for infrastructure as code.
Waypoint is one of the latest tools released by Hashicorp. In this article, we'll go into the following steps to explore Waypoint:
- Present what Waypoint is and the problem it solves.
- Install Waypoint on your local machine.
- Create a simple Golang application for example.
- Build and release an application into Kubernetes with Waypoint from end to end.
What Is Waypoint?
As DevOps practitioners, we work with developers to make their daily work easier. The goal is to give them as much autonomy as possible so that they gain in velocity. The main barrier is understanding the infrastructure.
It is this problem that Waypoint offers a solution. It allows developers to deploy, manage and observe their applications. Developers don't need to know the underlying infrastructure.
Waypoint supports many platforms such as Kubernetes or ECS to deploy applications. This is further abstracted from the user's point of view. It is also very easy to change the platform target.
A typical build, deploy and release workflow requires many configuration files. Waypoint handles the workflow in a single file named waypoint.hcl.
- Build and package the application.
- Publish the image to a container registry.
- Deploy the container to Kubernetes or ECS.
- Release the application to a public URL with HTTPS included.
Install Waypoint
Waypoint uses a client and server to build, deploy and release applications. A single binary handles both. The binary supports cross-platform environments: Mac, Windows & Linux.
$ brew tap hashicorp/tap$ brew install hashicorp/tap/waypointOnce installed the waypoint command is available on your machine:
$ waypoint
Welcome to Waypoint
Docs: https://waypointproject.io
Version: v0.1.5
Usage: waypoint [-version] [-help] [-autocomplete-(un)install] <command> [args]
Common commands
  build        Build a new versioned artifact from source
  deploy       Deploy a pushed artifact
  release      Release a deployment
  up           Perform the build, deploy, and release steps for the app
Other commands
  artifact        Artifact and build management
  config          Application configuration management
  context         Server access configurations
  deployment      Deployment creation and management
  destroy         Delete all the resources created for an app
  docs            Show documentation for components
  exec            Execute a command in the context of a running application instance
  hostname        Application URLs
  init            Initialize and validate a project
  install         Install the Waypoint server to Kubernetes, Nomad, or Docker
  logs            Show log output from the current application deployment
  runner          Runner management
  server          Server management
  token           Authenticate and invite collaborators
  ui              Open the web UI
  version         Prints the version of this Waypoint CLI
Create a Simple Golang Application
To practice Waypoint, we need a sample application to release it into Kubernetes. The following REST API code snippet will serve as an example:
package main

import (
    "fmt"
    "log"
    "net/http"
    "encoding/json"
)

type Server struct{}
type Todo struct {
    UserId      int
    Id          int
    Title       string
    Completed   bool
}

func (s *Server) ServeHTTP(w http.ResponseWriter, r *http.Request) {
    w.Header().Set("Content-Type", "application/json")
    w.WriteHeader(http.StatusOK)
    json.NewEncoder(w).Encode(&Todo{UserId: 1, Id: 1, Title: "delectus aut autem", Completed: false})
}

func main() {
    port := 8080
    fmt.Printf("Starting HTTP server on port %d", port)
    s := &Server{}
    http.Handle("/", s)
    log.Fatal(http.ListenAndServe(fmt.Sprintf(":%d", 8080), nil))
}We will use Cloud Native Buildpacks to build the application without any makefile. The go.mod is present to identify the language:
module github.com/guivin/waypoint-go-example

go 1.15$ go run main.go
Starting HTTP server on port 8080
$ curl -s http://localhost:8080 | jq
{
"UserId": 1,
"Id": 1,
"Title": "delectus aut autem",
"Completed": false
}Configure The Harbor Registry
Last part, we created the sample application to deploy it into Kubernetes. After building the application, Waypoint will create a container image. It needs a container registry to store it.
Harbor is an open-source project graduated by the Cloud Native Computing Foundation. It provides a secure container registry. Waypoint can authenticate to Harbor and pushes the image.
Install Harbor
Before starting, we need to deploy the NGINX ingress controller to access Harbor:
$ helm install ingress-nginx --namespace staging ingress-nginx/ingress-nginxTo be effective, we use the Helm chart to deploy Harbor:
$ helm repo add harbor https://helm.goharbor.io
$ helm install harbor --namespace staging harbor/harbor
Once all Harbor components are ready, the portal is accessible at https://core.harbor.domain. The username is admin and the password is here.

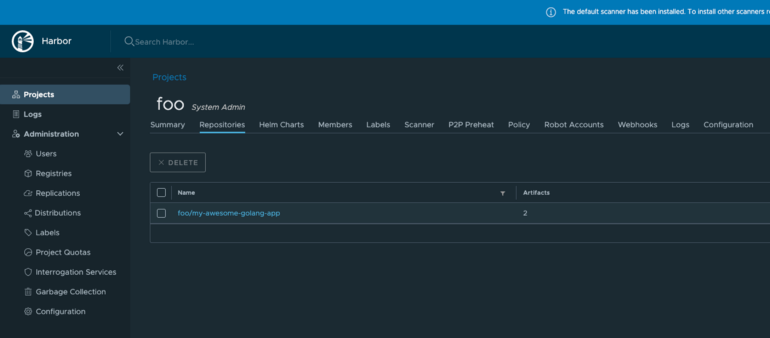
Create a Harbor project
We create a new project for the application:
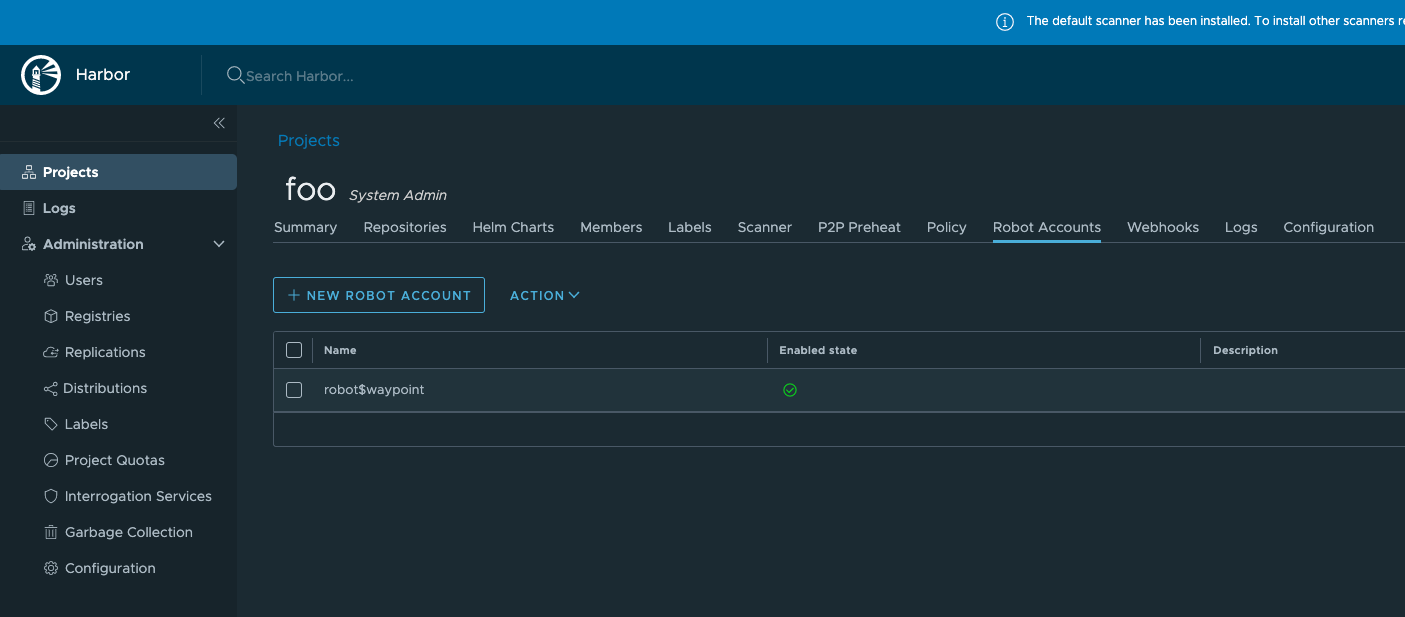
We create a robot account in the new fresh project. Waypoint will use these credentials later:
Deploy The Application With Waypoint
Configure the workflow
Our workflow has three stages: build, deploy & release. The waypoint.hcl file describes all these stages:
project = "my-awesome-golang-app"

app "my-awesome-golang-app" {
    labels = {
        "service" = "my-awesome-golang-app"
        "env" = "staging"
    }

    build {
        use "pack" {}
        registry {
            use "docker" {
                image        = "core.harbor.domain/foo/my-awesome-golang-app"
                tag          = "latest"
                local        = false
                encoded_auth = filebase64("dockerAuth.json")
            }
        }
    }

    deploy {
        use "kubernetes" {
            namespace       = "staging"
            probe_path      = "/"
            replicas        = 1
            service_port    = 8080
        }
    }

    release {
        use "kubernetes" {}
    }
}- A build stanza to create an artifact from the application source code. There are a lot of supported artifact formats such as container image, VM image, etc… We build a docker image and store it into a remote registry hosted by Harbor.
- A deploy stanza to stage the created artifact onto the Kubernetes cluster. The application is deployed in deployment but it doesn’t receive traffic yet.
- A release stanza to enable the deployment to expose the application. The goal is to make ready the application to receive traffic.
Waypoint reuses the robot account to authenticate and push the application to Harbor. The robot account credentials are in dockerAuth.json:
{
    "username": "robot$waypoint",
    "password": "xxxxxxxxxxxxxxx"
}
Don't forget to add dockerAuth.json in .gitignore
As final it deploys and releases the application into the Kubernetes cluster.
Build, deploy & release
Running the workflow is simple.
Initialize the Waypoint project:
$ waypoint init
✓ Configuration file appears valid
✓ Connection to Waypoint server was successful
✓ Project "my-awesome-golang-app" and all apps are registered with the server.
✓ Plugins loaded and configured successfully
✓ Authentication requirements appear satisfied.
Project initialized!
You may now call 'waypoint up' to deploy your project or
commands such as 'waypoint build' to perform steps individually.
All the workflow stages are playable in one command:
$ waypoint up
» Building...
Creating new buildpack-based image using builder: heroku/buildpacks:18
✓ Creating pack client
✓ Building image
 │ [exporter] Reusing layer 'heroku/go:profile'
 │ [exporter] Adding 1/1 app layer(s)
 │ [exporter] Reusing layer 'launcher'
 │ [exporter] Reusing layer 'config'
 │ [exporter] Adding label 'io.buildpacks.lifecycle.metadata'
 │ [exporter] Adding label 'io.buildpacks.build.metadata'
 │ [exporter] Adding label 'io.buildpacks.project.metadata'
 │ [exporter] *** Images (85ab3ada53c6):
 │ [exporter]       index.docker.io/library/my-awesome-golang-app:latest
 │ [exporter] Adding cache layer 'heroku/go:shim'
✓ Injecting entrypoint binary to image
Generated new Docker image: my-awesome-golang-app:latest
✓ Tagging Docker image: my-awesome-golang-app:latest => core.harbor.domain/foo/my-awesome-golang-app:latest
✓ Pushing Docker image...
 │ 2860c3734ddc: Layer already exists
 │ 459acae8a534: Layer already exists
 │ 761cdf87222e: Layer already exists
 │ 9aa3a9efcd12: Layer already exists
 │ c79bdd8f7423: Layer already exists
 │ fe6d8881187d: Layer already exists
 │ 23135df75b44: Layer already exists
 │ b43408d5f11b: Layer already exists
 │ latest: digest: sha256:e4b943e20f69b7e5f4a839a5b1360e84febb58dd4c20aac2cf642ab09
 │ 50f062e size: 2825
✓ Docker image pushed: core.harbor.domain/foo/my-awesome-golang-app:latest
» Deploying...
✓ Kubernetes client connected to https://kubernetes.docker.internal:6443 with namespace staging
✓ Creating deployment...
✓ Deployment successfully rolled out!
» Releasing...
✓ Kubernetes client connected to https://kubernetes.docker.internal:6443 with namespace staging
✓ Creating service...
✓ Service is ready!
» Pruning old deployments...
  Deployment: 01ERWQ5BQKQSC1MGHYJDZVERT2
✓ Kubernetes client connected to https://kubernetes.docker.internal:6443 with namespace staging
✓ Deleting deployment...
The deploy was successful! A Waypoint deployment URL is shown below. This
can be used internally to check your deployment and is not meant for external
traffic. You can manage this hostname using "waypoint hostname."
Release URL: http://10.111.121.39:80
Deployment URL: https://wildly-hardy-mink--v9.waypoint.run
$ waypoint init
✓ Configuration file appears valid
✓ Connection to Waypoint server was successful
✓ Project "my-awesome-golang-app" and all apps are registered with the server.
✓ Plugins loaded and configured successfully
✓ Authentication requirements appear satisfied.
Project initialized!
You may now call 'waypoint up' to deploy your project or
commands such as 'waypoint build' to perform steps individually.
The application is now running on the local Kubernetes cluster. Configure port-forwarding to access the service:
$ kubectl port-forward service/my-awesome-golang-app --namespace staging 8888:80
Forwarding from 127.0.0.1:8888 -> 8080
Forwarding from [::1]:8888 -> 8080
When requesting the application all is working like a charm:
curl -s http://localhost:8888/ | jq
{
  "UserId": 1,
  "Id": 1,
  "Title": "delectus aut autem",
  "Completed": false
}
Conclusion
An application workflow has most of the time the same stages: build, deploy & release. It is repetitive and you need to know how it works behind the curtain. Waypoint abstracts the "how" of the different workflow stages.
This is particularly interesting for developers. They want to stay focused on their code and deploy on a platform with ease. Waypoint allows that and gives autonomy to the developers.
A Waypoint configuration is very simple to write. The DevOps team can delegate the creation of workflow to developers. Waypoint is simple binary and may be a good candidate CI/CD purposes.